Render an Audio Waveform on iOS
 By
By 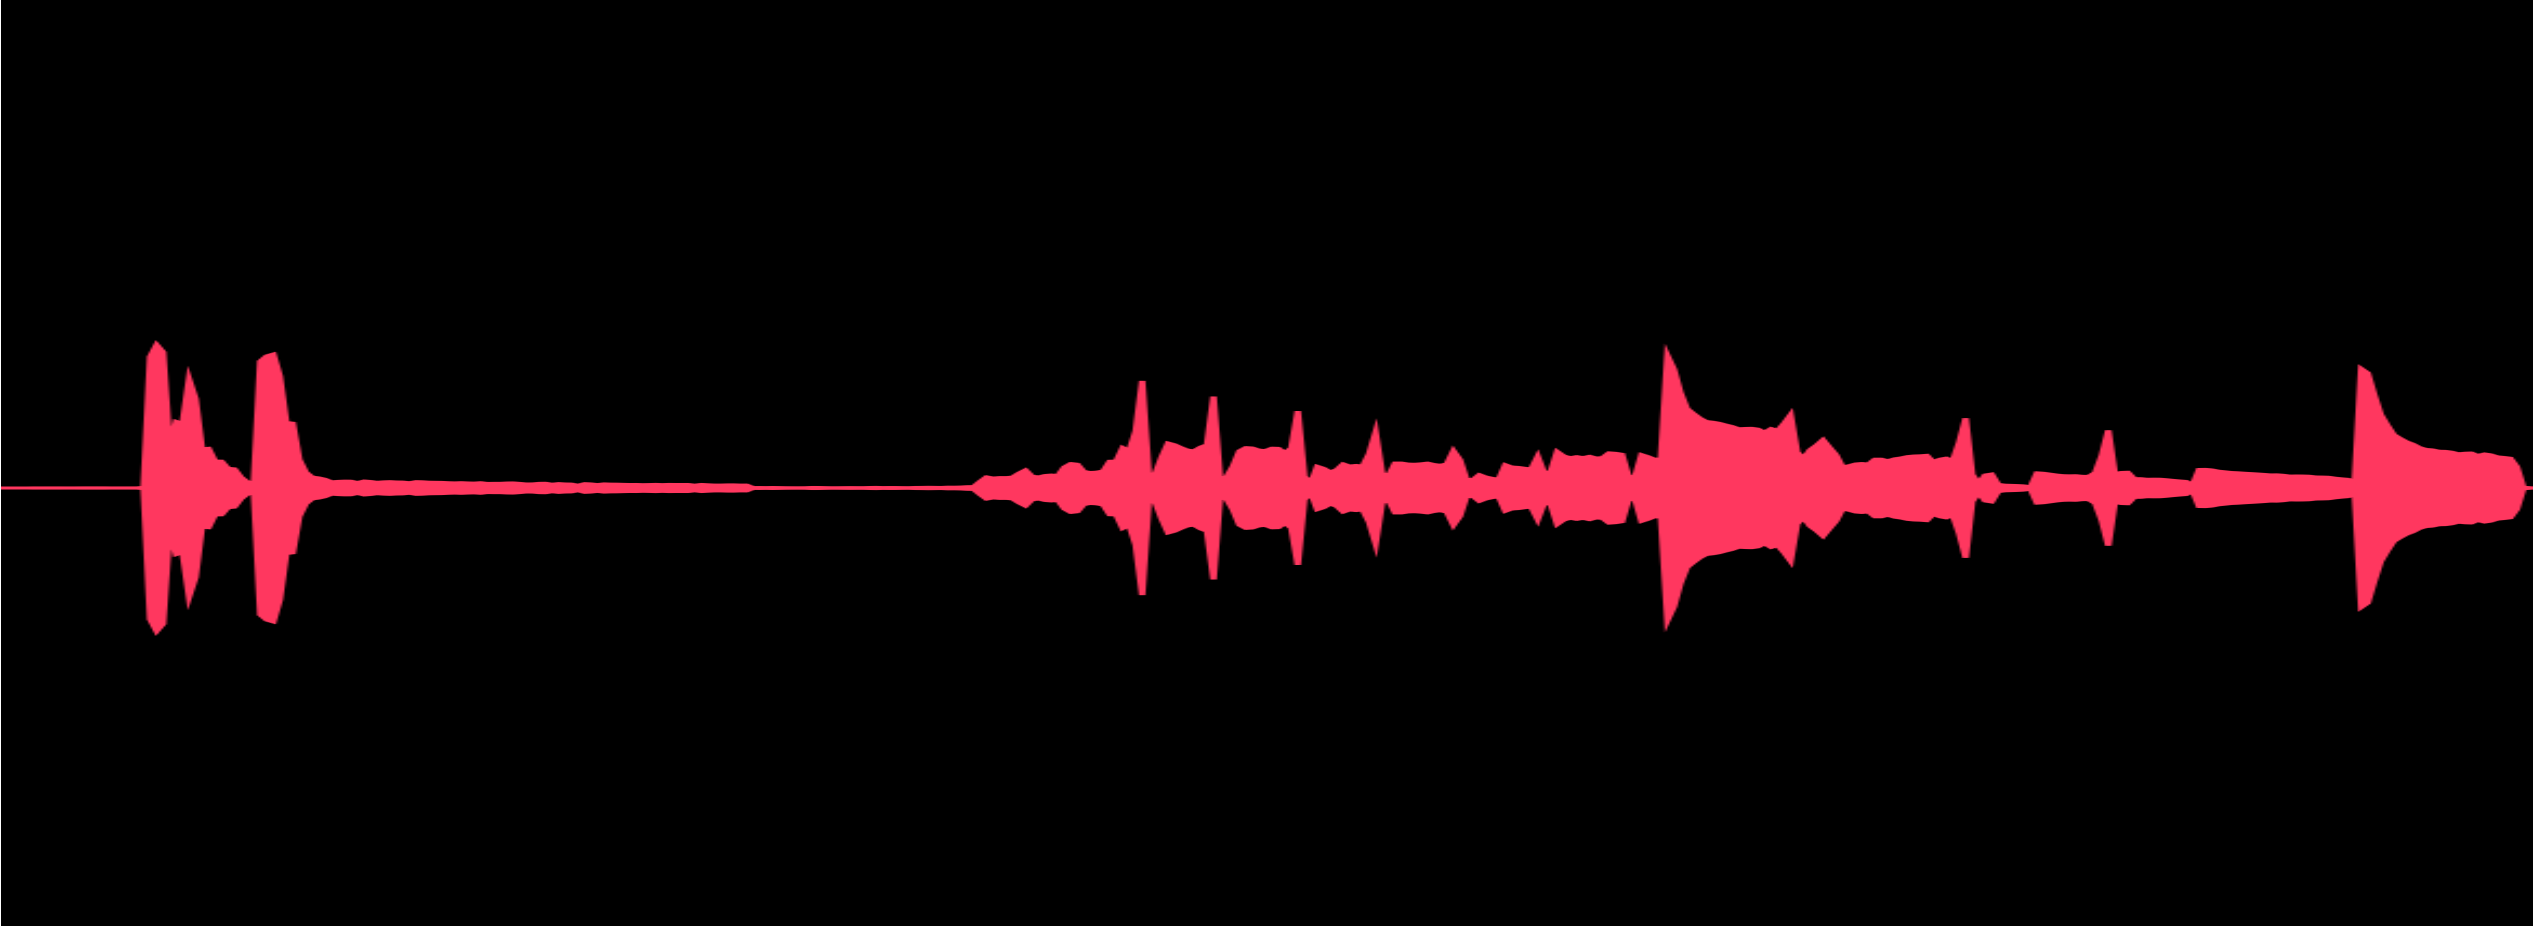
There is a beautiful duality to processing audio in software — it is both intensive and simple after you grok the concepts. I'd like to present my first steps in audio processing here by showing how simple it is to render an audio waveform on iOS using AVFoundation. But first, a story…
I've always loved music, so luckily when I was young, my dad presented me with the BMG 12 for 1↗︎ CD catalog and let me choose a few CDs because there was only one radio station in Marfa, TX where I grew up. I remember arguing over whether I should be able to listen to MC Lyte's "Ain't No Other↗︎" and Del the Funky Homosapien's "No Need for Alarm↗︎" because of the questionable content for a kid. But that was just a milestone in my story arc, and I think my dad recognized that fact at the time.
Around 1998 I was both introduced to and fell in love with MP3s. The allure of a digitized representation of a song that can be passed around was just too great to not fall in love with. I remember coming across a random spattering of MP3s on a web page for the first time and being blown away at the possibility of sharing music this way (this was before Napster, Kazaa, and the like). This event was so formative in my life that I even remember the songs. They were "Rammstein - Du Hast↗︎", "No Doubt - Don't Speak↗︎", and "Insane Clown Posse - Piggy Pie↗︎."
All of this new music was very different for me, but it was enough to cause a fascination with not only the ability to represent very different cultures through music, but also the delivery mechanism. Digitized music in shareable file formats was like the envelope, the postage stamp, and the pop up card that plays a jingle all wrapped up in one. And at the time I discovered it, I was the caveman receiving it. I recall listening to all of this new music in Winamp↗︎ and Sonique↗︎ and marveled at the impressive audio visualizers. So, this project is both me throwing my tiny toy hat in the in the audio visualization ring, and me paying homage to the giants of the industry that bridged the senses of sound and sight.
Now, the AVFoundation↗︎ framework makes audio analysis easy on iOS. This example shows one facet of the framework — that which is used to interpret individual samples of an audio file and then represent the amplitude (loudness) of them over time in a Bézier curve.
In order to understand the code, you must first understand how pulse-code modulation works. You take a waveform (like a simple sine wave) and periodically sample, or take the numeric value of the amplitude at discrete points. If you do this often enough, you can give a more-or-less true representation of the original source to the listener because they can effectively fill in the missing information if the period is fast enough.
Now on an iOS device and in almost any digital representation, this fact is negligible. You represent an analog audio waveform digitally and it looks like a smooth curve unless you zoom in very far. So, in my example, all I do is prepare AVFoundation to read samples from a file, take numerous samples from that file and create a scaled bezier curve of them and show them.
This is the source code for the entire project↗︎. I'll highlight some of the interesting parts below, though.
This is the part that collects and analyzes the audio samples:
let audioFile = try AVAudioFile(forReading: audioFileURL)
let frameCount = AVAudioFrameCount(audioFile.length)

guard let audioBuffer = AVAudioPCMBuffer(
    pcmFormat: audioFile.processingFormat,
    frameCapacity: frameCount
) else {
    completionQueue.async {
        completion(.failure(.bufferInitializationError))
    }
    return
}

try audioFile.read(into: audioBuffer, frameCount: frameCount)

guard let audioData = audioBuffer.floatChannelData else {
    completionQueue.async {
        completion(.failure(.pcmDataUnavailableError))
    }
    return
}

let channelCount = audioBuffer.format.channelCount
let frameLength = audioBuffer.frameLength
let totalUnitCount = Int64(channelCount * frameLength)
let completionSteps = totalUnitCount / 100

progress.totalUnitCount = totalUnitCount
progress.becomeCurrent(withPendingUnitCount: totalUnitCount)

var maxLevel: Float = 0.0
var minLevel: Float = 0.0
var completedUnitCount = Int64(0)

for channel in 0..<channelCount {
    for frame in 0..<frameLength {
        guard !progress.isCancelled else { break }

        let channel = Int(channel)
        let frame = Int(frame)
        let level = audioData[channel][frame * audioBuffer.stride]

        // Calculate the max and min levels so we can scale
        // the view to look reasonable

        maxLevel = max(level, maxLevel)
        minLevel = min(level, minLevel)

        completedUnitCount += 1

        if completedUnitCount % completionSteps == 0 ||
           completedUnitCount >= totalUnitCount {
            progress.completedUnitCount = completedUnitCount
        }
    }
}

let waveform = Waveform(
    audioFile: audioFile,
    audioBuffer: audioBuffer,
     levels: minLevel...maxLevel
)
And this is the part that renders them:
override func draw(_ rect: CGRect) {
    super.draw(rect)

    UIColor.systemBackground.setFill()
    UIBezierPath(rect: rect).fill()

    let positivePath = UIBezierPath()
    let negativePath = UIBezierPath()
    let maxLevel = waveform.maxLevel
    let halfHeight = rect.height * 0.5

    negativePath.move(to: .zero)
    positivePath.move(to: .zero)

    if waveform.audioBuffer.format.channelCount > 0, let audioData = waveform.audioBuffer.floatChannelData {
        let framesPerPoint = waveform.audioBuffer.frameLength / AVAudioFrameCount(rect.width)
        var drawnLevel = Float(0)

        for frame in 0..<waveform.audioBuffer.frameLength {
            let level = audioData[0][Int(frame) * waveform.audioBuffer.stride]
            drawnLevel = max(abs(drawnLevel), abs(level))

            if frame % framesPerPoint == 0 || frame == waveform.audioBuffer.frameLength {
                let x = rect.width * CGFloat(frame) / CGFloat(waveform.audioBuffer.frameLength)
                let y = halfHeight * CGFloat(drawnLevel) / CGFloat(maxLevel)

                negativePath.addLine(to: CGPoint(x: x, y: -y))
                positivePath.addLine(to: CGPoint(x: x, y: y))

                drawnLevel = 0
            }
        }
    }

    positivePath.addLine(to: CGPoint(x: rect.width, y: 0))
    negativePath.addLine(to: CGPoint(x: rect.width, y: 0))
    positivePath.append(negativePath)
    positivePath.close()

    UIColor.systemPink.setStroke()
    UIColor.systemPink.setFill()

    positivePath.apply(CGAffineTransform(translationX: 0, y: halfHeight))
    positivePath.lineWidth = 1
    positivePath.fill()
    positivePath.stroke()
}
And that's it! That's quite a lot of code but each step is purposeful and necessary to analyze and display an audio waveform. Hopefully this saves you some time if you are figuring out how to do this yourself.